

使用certbot-auto说明
参考:
https://www.jianshu.com/p/d88e19c8963b
https://www.v2ex.com/amp/t/469773
1.获取certbot-auto
# 找一个合适的目录下载certbot-auto
wget https://dl.eff.org/certbot-auto

# 设置权限
chmod a+x certbot-auto
2.生成证书
# 需要先关闭nginx
service nginx stop

# 在certbot-auto目录生成证书
./certbot-auto certonly
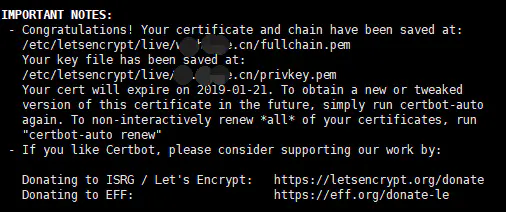
根据提示,输入相关资料后,如打印类似以下内容(图片是我从参考链接中copy的),即可在 /etc/letsencrypt/archive 目录下得到证书文件。
如果不想一步一步走,也可以直接使用以下命令直接生成。注意xxx需要替换为自己的东西:
./certbot-auto certonly --standalone --email xxx@xxx.com --agree-tos -d xxx.com -d www.xxx.com
3.配置nginx
一般 nginx 配置文件路径为: /etc/nginx/nginx.conf
下面是 nginx 的配置文件,仅供参考:
user  nginx;
worker_processes  1;

error_log  /var/log/nginx/error.log warn;
pid        /var/run/nginx.pid;

events {
    worker_connections  1024;
}

http {
    # 设置request请求大小
    client_max_body_size 20m;
    server {
        listen  443 ssl;
        server_name xxx.com www.xxx.com;
        location / {
            proxy_pass http://127.0.0.1:8080;
        }
        ssl_certificate /etc/letsencrypt/live/www.xxx.com/fullchain.pem;
        ssl_certificate_key /etc/letsencrypt/live/www.xxx.com/privkey.pem;

        ssl_protocols TLSv1 TLSv1.1 TLSv1.2;
        ssl_ciphers HIGH:!aNULL:!MD5;
    }
    server {
        listen 80;
        server_name xxx.com www.xxx.com;
        client_max_body_size 1024m;
        rewrite ^(.*)$  https://www.xxx.com permanent;
    }
}
检查 nginx 配置文件是否正确
nginx -tc /etc/nginx/nginx.conf
配置完成后重启 nginx
systemctl status nginx
4.续约证书
使用上面方式生成的证书一般只有3个月的有效期,证书到期前 Let’s Encrypt 会通过邮件告知证书快要到期了。
文章开头的 参考链接 里的生成证书方式,就是本文所介绍的方式,由于参考链接里没有介绍续约方式,所以我自己找了一些方式,但是都存在各种奇怪的错误。后面自己尝试了下重新生成证书(不是续约证书),没想到成功了。
# 证书快到期时,重新生成证书
./certbot-auto certonly --standalone --email xxx@xxx.com --agree-tos -d www.xxx.com
仔细观察你可能会注意到上面的命令与文章开头的命令相比,少了一个 -d xxx.com,因为我使用文章开头的命令重新生成证书时,报了一个错,说无法解析 xxx.com,我猜测报错原因是 xxx.com 域名解除了解析到 www 以外,还解析了其它地址。后面去掉 -d xxx.com 就成功生成证书了。PS:我觉得使用其它方式产生的错误也是这个原因~
-end-